Documenting December - Keeping it Simple, Smartypants
Today's guest post is from Awesome Ladies Creative Team member Theresa. Theresa is packing up and moving soon, so she came up with a simple, yet brilliantly creative way to document her December without all the stress that a huge project can add to the already busy holiday season (even if you aren't moving to a brand new place).
Hi! My name is Theresa. My family will be living out of suitcases for two months—during Christmas!—and I just can’t handle the stress and effort of scrapbooking every day. Today, I’m going to talk about how I’m going to manage my holiday album despite limited time and space in my luggage, while keeping the mess and the stress to a minimum.
This year, I’ve committed to journal every day on a 3x4 card and take one Christmas-related picture with my iPhone. Just one. Every single day. No pressure to print. No pressure to do anything but photograph and spend five minutes jotting down my thoughts. I have a couple of list cards and Currently cards to fill in on days when I just can’t face writing (or don’t have anything to say). Any supplies I take along have to fit in a 6x4 Iris photo box, which meant that I had to finish 100% of my set-up ahead of time.
The entire album took me about four hours to put together. Very simple. Very stress free. And I’ll still be documenting the holidays. Here’s how I did it:
Step the First: Gather supplies
This year, I’m using a 6x4 WRMK album. To get 6x4 pages with 3x4 divisions, I cut up a bunch of Simple Stories page protectors that I bought on sale years ago and still haven’t used. I’ve included a couple of pages with 2x2 and 6x4 pockets, just in case, but I’ve promised myself not to stress if I don’t use them.
How to create a 6x4 page of 2x2 pockets: Cut an 8 x 10 coin collector pocket page into two 6x4 pages, using a hole punch to put new holes in the right places.
Once I had my page protectors cut, I started gathering papers and embellishments. I went for volume, not simplicity. I pulled not only all of the Christmas papers in the color scheme I wanted to use, but also Thickers, mini-alphas, stickers, die cuts, glitter tape, twine, ribbon, wood veneer, and anything else I could thinking of that might match my colors.
I also had some embellishments and die cuts left over from last year’s abandoned December Daily, and pulled my favorites from those as well.

Whoa. That’s a lot.
Step the Second: Make embellishments
Instead of creating individually designed embellishment clusters for each day, I created embellishments that I could easily paste onto a 3x4 card. I pulled 6x6 paper (including some awesome metallics), and die cut several circles and hexagons of varying sizes. It took about 20 minutes to run everything through my Big Shot, and I promised myself that I would toss scraps and anything I wouldn’t use. Cutting the paper is not a commitment to using it!
One of my frustrations with getting everything small and portable was stickers. I love these Little Yellow Bicycle number stickers, but couldn't figure out how to transport them as die-cuts.
How to turn a sticker into a die cut: Peel the sticker off its backing, then sprinkle the sticky side with baby powder. Shake off the excess powder, and voila you’ve got a die cut instead of a sticker.
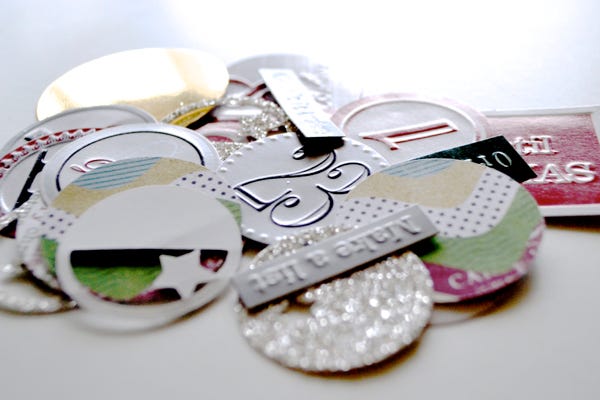
After die cutting, I stamped some sentiments on plain white cardstock, cut them out, and then started adhering layers together.
Step the third: Cut the cardstock and print some Currently cards
I kept having to remind myself that 1) it is OK to a cut paper and not use it and 2) it is OK to throw away scraps and paper that I don’t use. I cut up white and gridded cardstock into 3x4 cards, then attacked my pile of neutral and wood grain cardstock to do the same. Then I printed half a dozen #currently cards to use on transition days and days when I can’t find ten minutes to actually journal.
Step the fourth: Start making cards
Once I had a pile of embellishments and cards, it was time to put them together.


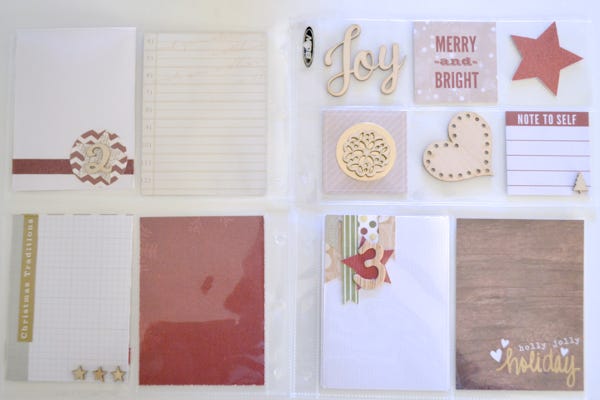
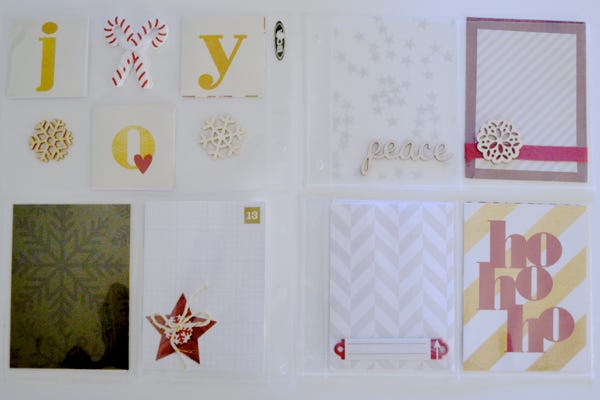
Cutting and pasting is the most therapeutic part of scrapbooking for me, and before I knew it, I had a pile of 30-or-so cards to stick into my album. I put numbers on about a third of them, keeping in mind that I may want to move cards around later on, and that I do have some space in my 6x4 container for wood veneer and a few small alphas.
Step the fifth: Put the album together
I slid my own cards into pockets, along with some Simple Stories Cozy Christmas cards, as well as several blank pieces of patterned paper as placeholders for future pictures.
Step the sixth: Assemble my portable “kit”
Putting the kit together was one of the hardest parts. First, I had to figure out the best way to organize all of the small pieces and remaining die cuts. Then, I had to make some real decisions about what I would be likely to use and not use over the coming month.
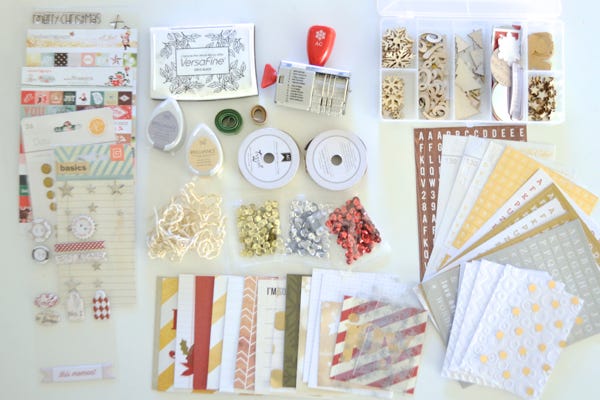
Wood veneer? YES PLEASE.
Glitter tape and ribbon? Only in a few shades.
One stamp set and black ink? Yes.
Washi? WHY DO YOU TAKE UP SO MUCH SPACE?!? You’re out.
I focused on the supplies that I would get the most use out of. I got rid of anything I couldn’t imagine using for several different cards. I still have more than I’m happy with, but it’s better than having to carry a 12x12 Iris case on the plane.
Step the almost-last: Make sure it fits.
I ended up putting my wood veneers and die cuts in a separate container to make them easier to access. I tried glassine sacks and ziplock baggies, but neither of them worked very well.
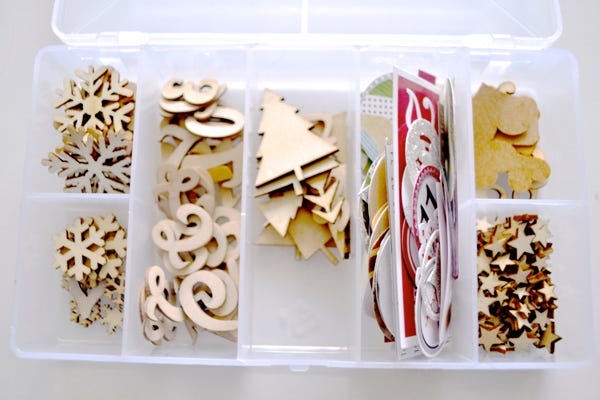
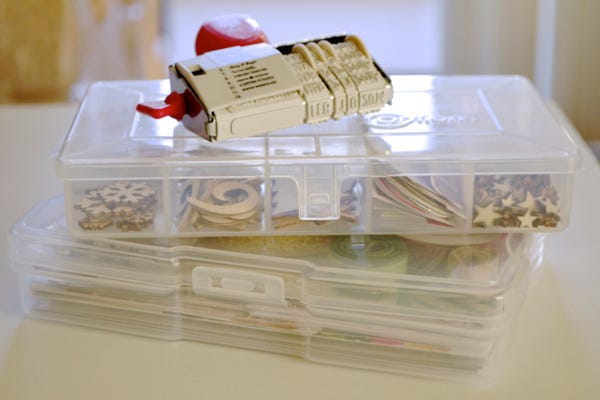
Here’s the entire kit:
Step the last: Write down ideas for journaling
I know already that we won’t be doing Christmas-y every day. For the many days we’ll be on the road (or on a plane) in transit over the next few months, I came up with a few easy ideas to make journaling simpler when my brain is full of things that aren’t scrapbooking.
Lists
Favorite Christmas Carols
What we’re getting everyone for Christmas
Still on my TODO list
What we’re bringing in our bags to celebrate the holidays
Photos I want to take
What we’re bringing in our bags to celebrate the holidays
My parents’ tree (if it goes up before we go)
Thanksgiving dinner
Starbucks Christmas coffee cup
Snow (hopefully!)
Wrapping presents
Christmas dinner
What are YOU doing to document the holidays?
Documenting memories during the holidays doesn’t have to be stressful and frustrating. Taking few hours (and only a few hours!) to prep a small album and supplies ahead of time. I’m focusing on writing and the memories, instead of pouring hours upon hours into an elaborate album that I won’t even finish. What are YOU doing to make your holiday documentation simpler and easier?
Supply List
Papers
Carta Bella: So This Is Christmas (6x6 pad)
Simple Stories: Cozy Christmas journaling cards and papers
Stampin’ Up: Season of Style Designer Journaling Tags
Pretty Little Studio: Winter Wonderland, Cold Winter 12x12
Little Yellow Bicycle: 25 Days of Christmas Fresh Verse Stickers, Favorite Pieces Stickers
Webster’s PageS: It’s Christmas, by Allison Kreft, 12x12 Transparency
MME: Vintage Christmas 12x12 Joy Paper
Echo Park: Dots and Stripes Christmas, 12x12s
American Crafts: POW glitter paper, 12x12 in gold
Embellishments
Studio Calico: Snowflakes wood veneer
Studio Calico: Stars wood veneer
Recollections: Christmas tress wood veneer
MyDocumentedLife: Numbers and words wood veneer
Teresa Collins: Santa’s List buttons
Basic Grey: Basics Stars
American Crafts: Gold and red glitter tape
Studio Calico: Gold enamel dots
Pink Paislee: Solstice Die Cuts, transparency
Webster’s Pages: All That Glitters word stickers
Webster’s pages: Gingerbread word stickers
American Crafts: Christmas roller stamp
Dear Lizzy: Fifth and Frolic Remarks gold and white letter mini-alpha
Studio Calico: South of Market mini-alpha stickers (x2)
Studio Calico: Essentials wood grain tiny alpha stickers
MME: Mini Alphas in several colors
Gold twine
Sequins
Gross grain ribbon
Craft Supplies
Tsukineko: Memento Metallic Ink, Starlite Silver and Galaxy Gold
Tsukineko: VersaFine black ink
Paper Smooches: Christmas Sampler stamp
Misc
WRMK 6x4 album
WRMK 6x4 page protectors
Simple Stories: SN@P page protectors
Iris: 6x4 photo container
Theresa Sondjo is a paper crafter, a writer, a cook, a militant feminist, a blogger, a mother, a nerd, a reader, and a love of books and coffee. Her goal in life is to leave the world a better place than she found it. In pursuit of that goal, she’s traveled the world as a Peace Corps Volunteer, a tech entrepreneur in West Africa, and now works for her government abroad.

