How To: Stamp a Repeating Background
![rukristin How To Stamp a Repeating Background #rukristinstamps rukristin How To Stamp a Repeating Background #rukristinstamps](https://substackcdn.com/image/fetch/w_1456,c_limit,f_auto,q_auto:good,fl_progressive:steep/https%3A%2F%2Fsubstack-post-media.s3.amazonaws.com%2Fpublic%2Fimages%2F7f4ffd30-899a-4907-95aa-6bb3c503c125_2448x2448.jpeg)
This week's Awesome Ladies Project Scrapbook Challenge is all about stamping. Today I'm sharing how to stamp a repeating background using the rukristin BASICS relationship set and my favorite Neon ink.
![How to stamp a repeating background pattern How to stamp a repeating background pattern](https://substackcdn.com/image/fetch/w_1456,c_limit,f_auto,q_auto:good,fl_progressive:steep/https%3A%2F%2Fsubstack-post-media.s3.amazonaws.com%2Fpublic%2Fimages%2Fea1e21b7-12f4-4325-8b60-23b94740d849_735x1102.jpeg)
Stuff You Need
Favorite Stamp Set (I used the rukristin BASICS relationships set)
White Cardstock (I used a 9x12" sheet I then cut down to two 6x8" sheets)
![rukristin How To Stamp a Repeating Background #rukristinstamps rukristin How To Stamp a Repeating Background #rukristinstamps](https://substackcdn.com/image/fetch/w_1456,c_limit,f_auto,q_auto:good,fl_progressive:steep/https%3A%2F%2Fsubstack-post-media.s3.amazonaws.com%2Fpublic%2Fimages%2Fffecff52-f748-4071-9335-454e87ff73b1_3000x2250.jpeg)
Step One:
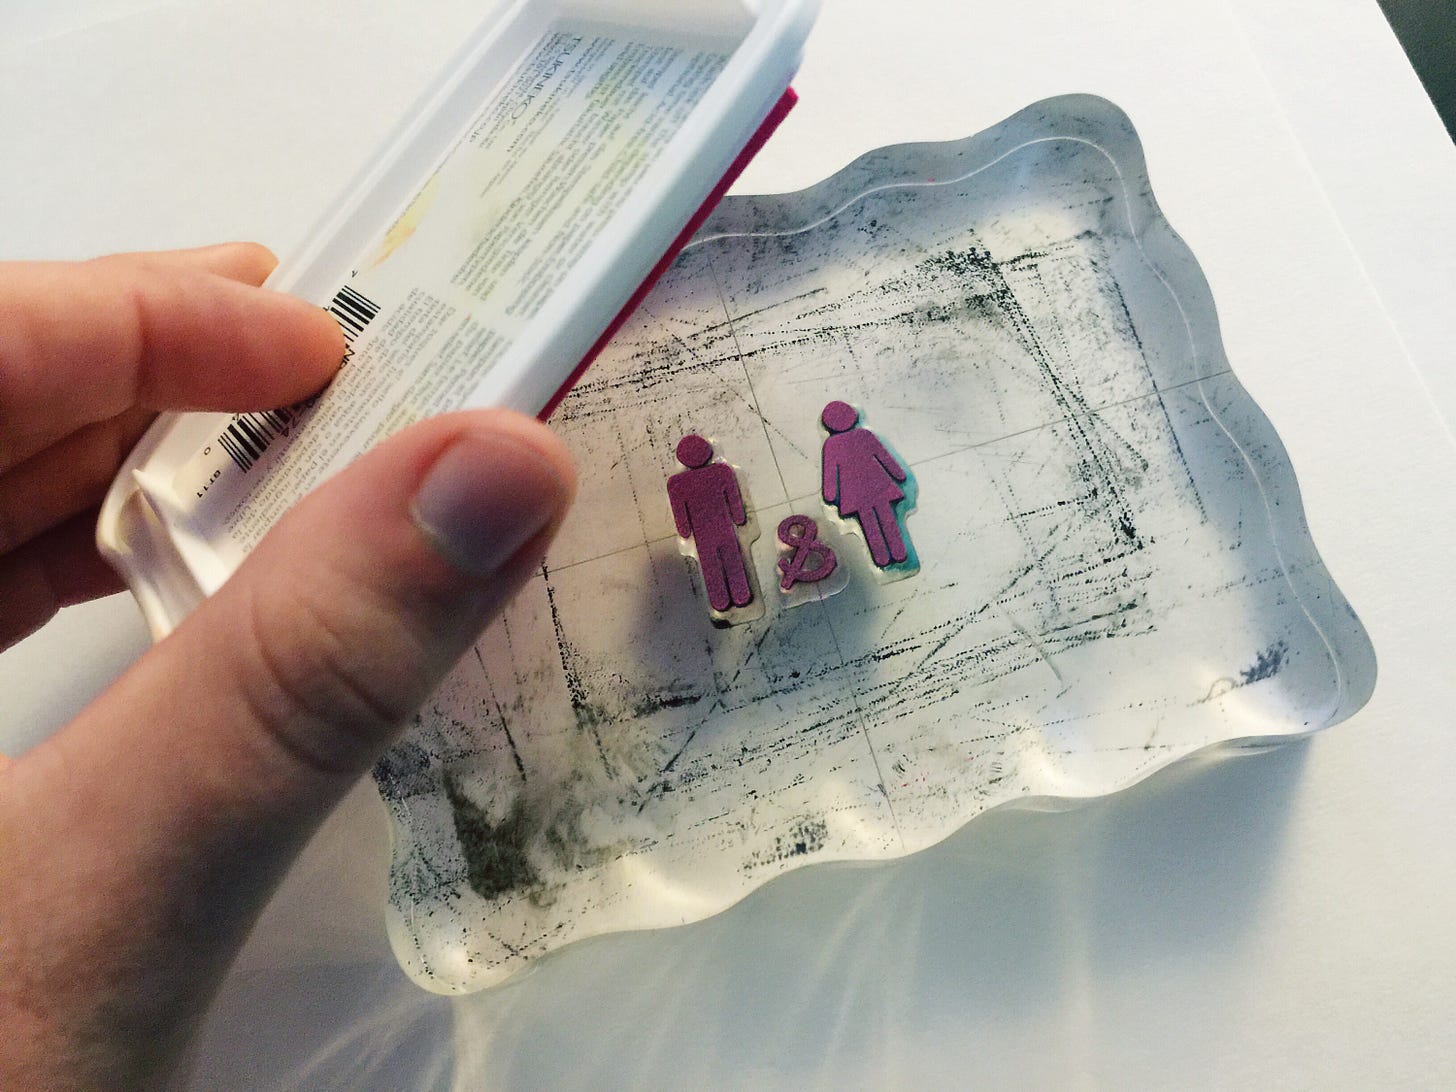
Line up a cluster of stamps (or use just one). The best way to create a stamp cluster is to start by pulling off the clear stamps and laying them out on a sheet of paper, with the cling side face up. When you're happy with the way the stamps look, press your clear block down onto the cling side of the stamps.
For this project, I used the girl, boy, and ampersand symbols from the relationship set. I lined the stamps up so that the ampersand fit in between the boy and the girl, and all the bottom edges lined up. It's a good idea to test your stamp out on some scrap paper before starting on your background, just to make sure your stamps line up the way you want them to. After a few test stamps, I was ready to get started on my background.
![rukristin How To Stamp a Repeating Background #rukristinstamps rukristin How To Stamp a Repeating Background #rukristinstamps](https://substackcdn.com/image/fetch/w_1456,c_limit,f_auto,q_auto:good,fl_progressive:steep/https%3A%2F%2Fsubstack-post-media.s3.amazonaws.com%2Fpublic%2Fimages%2F04ec3064-392e-484f-a3a2-e6f6e4be8113_3000x2250.jpeg)
Step Two:
Ink up your stamp with your favorite ink. For this project I used Neon Pink ink. I inked my stamp in between each press. While this isn't totally necessary, I like the uniform look that it gives my stamped images.
![rukristin How To Stamp a Repeating Background #rukristinstamps rukristin How To Stamp a Repeating Background #rukristinstamps](https://substackcdn.com/image/fetch/w_1456,c_limit,f_auto,q_auto:good,fl_progressive:steep/https%3A%2F%2Fsubstack-post-media.s3.amazonaws.com%2Fpublic%2Fimages%2Fb7d6d741-122a-4742-9438-979148ea47bf_3000x2250.jpeg)
Step Three:
Pick a place and start stamping. I personally like starting in the center-right area and moving outward from there.
![rukristin How To Stamp a Repeating Background #rukristinstamps rukristin How To Stamp a Repeating Background #rukristinstamps](https://substackcdn.com/image/fetch/w_1456,c_limit,f_auto,q_auto:good,fl_progressive:steep/https%3A%2F%2Fsubstack-post-media.s3.amazonaws.com%2Fpublic%2Fimages%2Faf618733-f742-4703-aaa9-5086545b4e87_3000x2250.jpeg)
Step Four:
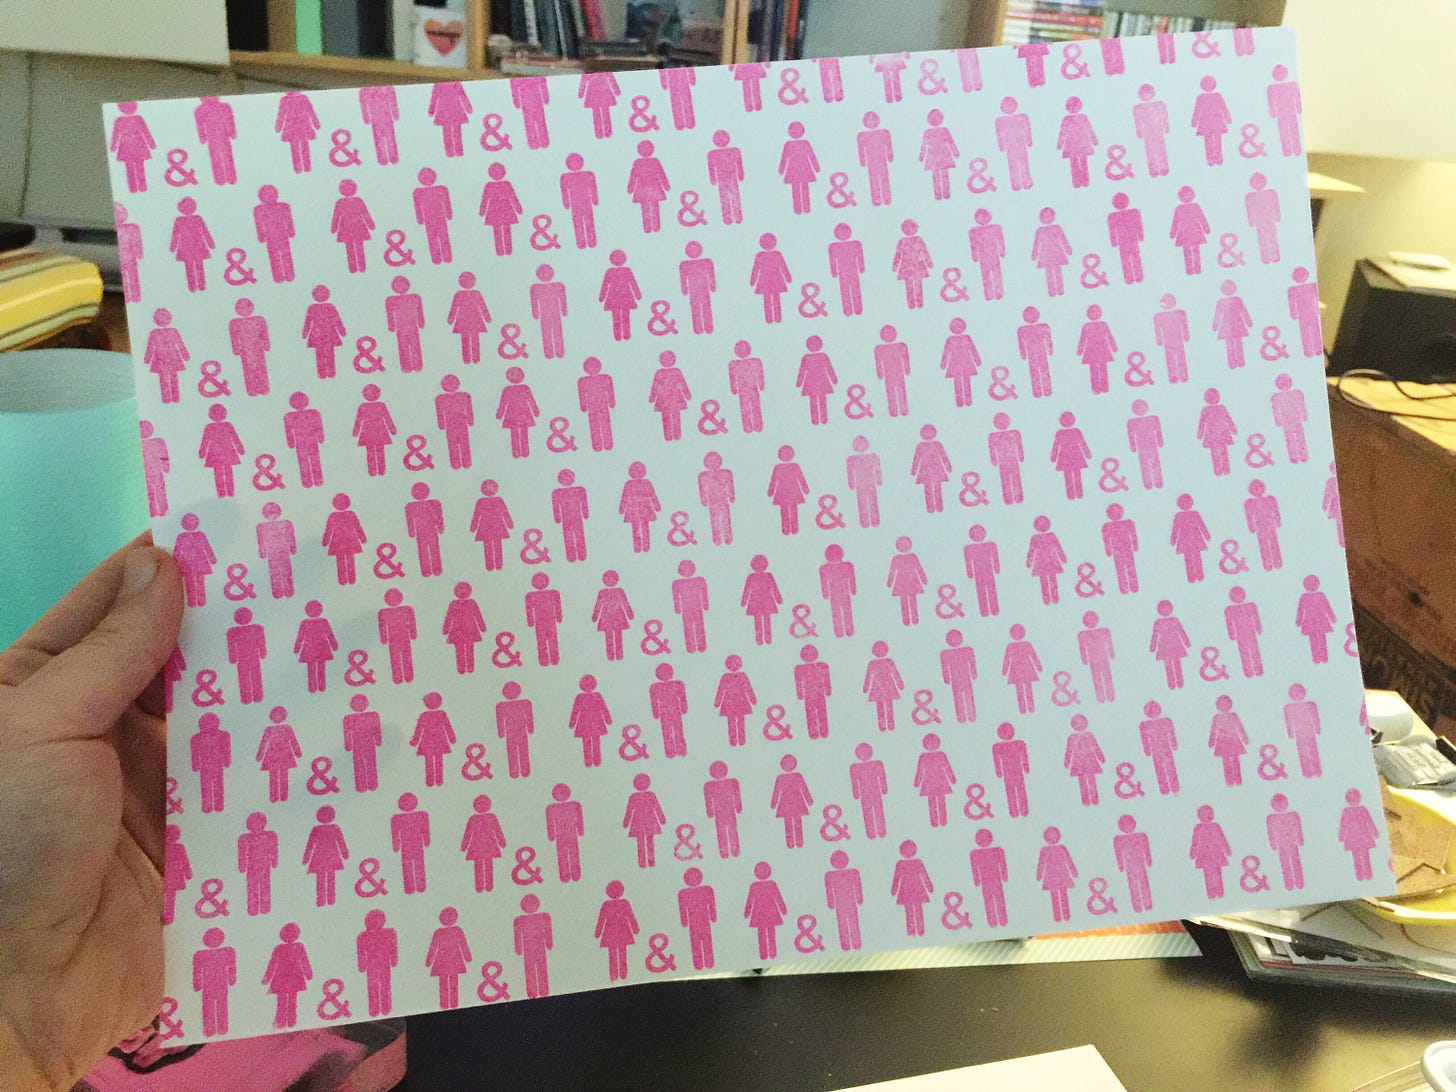
Keep stamping. To get started on the background pattern I first stamped again to the left of the original image. I then stamped below the original, but offset by half (I lined up the girl figure's head underneath the ampersand). I continued with this pattern, re-inking my stamp each time.
![rukristin How To Stamp a Repeating Background #rukristinstamps rukristin How To Stamp a Repeating Background #rukristinstamps](https://substackcdn.com/image/fetch/w_1456,c_limit,f_auto,q_auto:good,fl_progressive:steep/https%3A%2F%2Fsubstack-post-media.s3.amazonaws.com%2Fpublic%2Fimages%2Ff52cb2e9-7b0b-4d72-aa89-e7314f173f0f_3000x2250.jpeg)
Step Five:
Continue with the pattern until you fill up the entire page. Its important to remember to stamp off the edge of the paper (put some scrap paper underneath) to get a continuous patterned look.
I used this sheet of paper as the background for this two page layout. I trimmed it down to two 6x8" sheets, added my photo, some patterned paper and washi tape before finishing off the layout with some more stamping.
![rukristin How To Stamp a Repeating Background #rukristinstamps rukristin How To Stamp a Repeating Background #rukristinstamps](https://substackcdn.com/image/fetch/w_1456,c_limit,f_auto,q_auto:good,fl_progressive:steep/https%3A%2F%2Fsubstack-post-media.s3.amazonaws.com%2Fpublic%2Fimages%2F74779ea8-f826-4b09-9ff2-fb5554ffb1fb_2448x2448.jpeg)
![rukristin How To Stamp a Repeating Background #rukristinstamps rukristin How To Stamp a Repeating Background #rukristinstamps](https://substackcdn.com/image/fetch/w_1456,c_limit,f_auto,q_auto:good,fl_progressive:steep/https%3A%2F%2Fsubstack-post-media.s3.amazonaws.com%2Fpublic%2Fimages%2Fc959acf5-1f7e-4b17-922b-25787449c656_3000x2250.jpeg)